Connect to an instance
Orchesty 3.0 inverts the old "configure env first, then register" flow. You register the worker in the Admin UI first, the UI hands you the exact env vars to paste into the worker's .env, and you start the worker. There is no API key to look up by hand and no separate URL plumbing.
There are two registration types: HTTP (the platform reaches the worker on a public hostname) and Tunnel (the worker dials the platform, no public hostname needed).
1. Open the Add Worker dialog #
In the Admin UI, go to Settings -> Workers -> Add Worker.
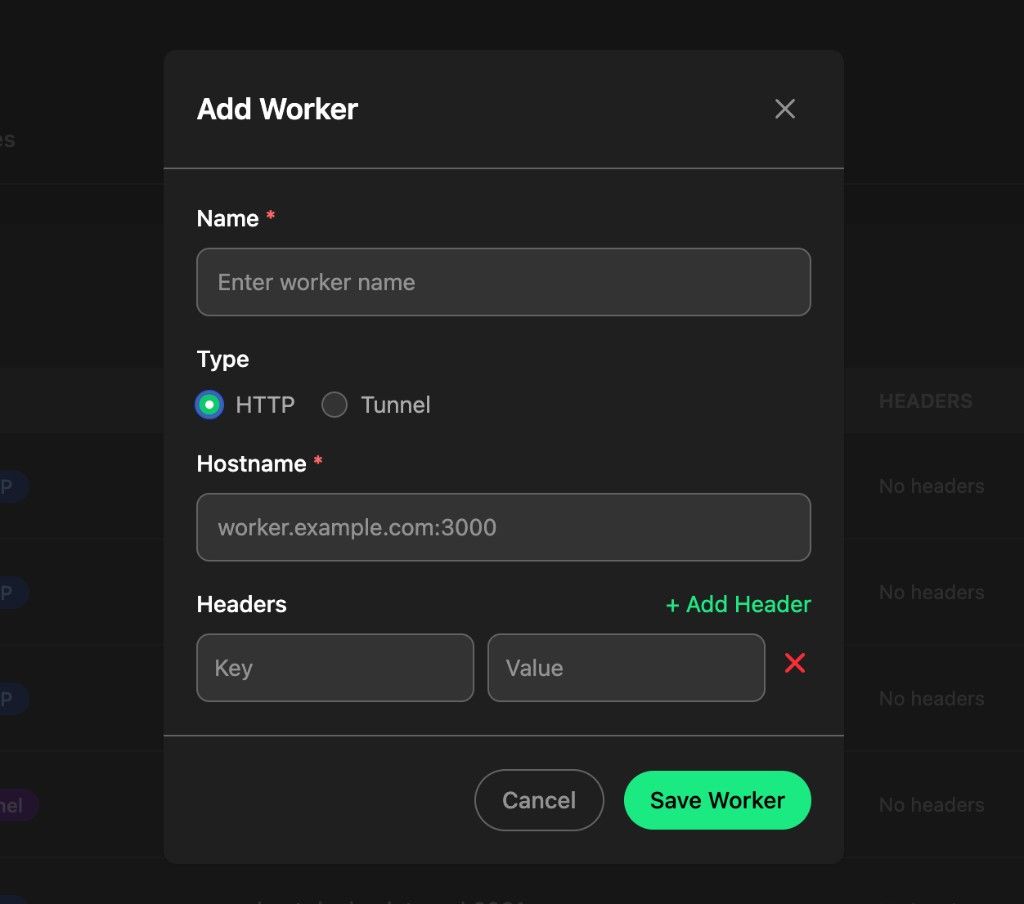
Pick a Type:
- HTTP — for workers that have a routable hostname the platform can reach (production deployments, LAN, ngrok / cloudflared tunnels you operate yourself, ...).
- Tunnel — for local development where you don't want to expose the worker publicly. The worker opens an outbound connection to the platform; the platform routes work to it through that connection.
2a. HTTP workers #
- Enter a Name (e.g.
acme-prod,local-dev). - Enter the Hostname the platform will reach the worker on, including the port (e.g.
worker.example.com:3000,192.168.1.42:8080). - Optionally add custom Headers (e.g. an auth header your reverse proxy expects in front of the worker).
- Click Save Worker.
2b. Tunnel workers #
- Enter a Name.
- Click Save Worker.
That's it — there is no hostname to enter, because the worker initiates the connection to the platform.
3. Copy the env vars into the worker #
Right after saving, the Admin UI opens a Worker Configuration dialog with the exact environment variables your worker needs:
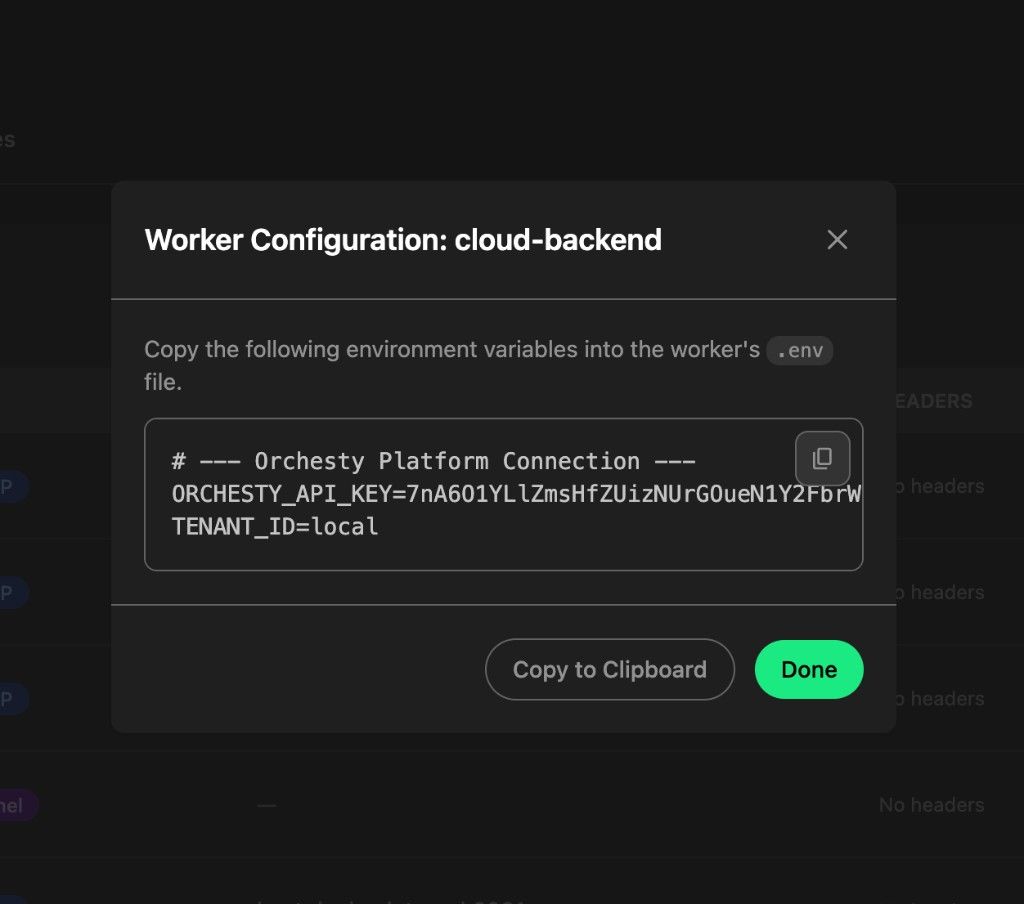
The block contains the API key and the platform endpoints the worker should use. Click Copy to Clipboard and paste the contents into your worker's .env (overwriting any matching keys), then click Done.
Need the env vars again later? Open the worker in Settings -> Workers, then Show configuration. The same dialog opens.
4. Start the worker #
From the worker project root:
npm start
The worker boots, reads the env you just pasted, and connects to the platform. Within a few seconds, the worker shows up as connected in the Admin UI and every node you register in src/index.ts (Node.js) or your PHP services file becomes available in topology editors.
When to use HTTP vs Tunnel #
| Use HTTP when... | Use Tunnel when... |
|---|---|
| The worker runs on a server with a stable, routable hostname. | The worker runs on your laptop or behind a NAT. |
| You can / want to manage TLS, ingress, and firewalls. | You want to skip all of that. |
| You need fine-grained network control (custom headers, mTLS in front, ...). | You just want it to work locally during development. |
| Production. | Development, demos, quick experiments. |
The Tunnel option supersedes the old workflow of running ngrok and pasting the public URL into the worker registration form. You can still do that with HTTP if you prefer; Tunnel is just less work.
Tunnel support in the PHP SDK is on the roadmap. Today, PHP workers should use HTTP (with ngrok / cloudflared / a LAN IP for local development).
What's next #
Continue with Your first custom node to add code and see it run end to end.