Your first custom node
This page walks through writing the smallest useful node: it receives a message, attaches a timestamp, and forwards it. By the end you'll have a node available in the Admin UI's topology editor.
The flow is the same whether you went through Worker setup (slim worker pointing at an existing instance) or Full-stack setup (full local platform). The only differences are file paths and the restart command; both are shown side-by-side below.
For background read Concepts: Topologies. For the full custom-node API see Reference: Node.js / ACommonNode or Reference: PHP / CommonNodeAbstract.
The PHP variant is only relevant in the Full-stack setup; the Worker setup ships a Node.js starter today.
1. Create the node file #
Paths differ per setup: in Worker setup they are relative to the worker root (src/...); in Full-stack setup they live under worker/....
// Worker setup:    src/MyTimestamp/AddTimestampNode.ts
// Full-stack setup: worker/src/MyTimestamp/AddTimestampNode.ts
import ACommonNode from '@orchesty/nodejs-sdk/dist/lib/Commons/ACommonNode';
import ProcessDto from '@orchesty/nodejs-sdk/dist/lib/Utils/ProcessDto';

export default class AddTimestampNode extends ACommonNode {
    public getName(): string {
        return 'add-timestamp';
    }

    public async processAction(dto: ProcessDto): Promise<ProcessDto> {
        const data = dto.getJsonData() as Record<string, unknown>;
        dto.setJsonData({
            ...data,
            receivedAt: new Date().toISOString(),
        });
        return dto;
    }
}
2. Register it in the worker #
// Worker setup:    src/index.ts
// Full-stack setup: worker/src/index.ts
import AddTimestampNode from './MyTimestamp/AddTimestampNode';

function prepare(): void {
    initiateContainer();
    container.setNode(new AddTimestampNode());
}
Custom nodes that don't authenticate against an external service are registered with no second argument (no application).
3. Restart the worker #
make start
The Admin UI now exposes add-timestamp to the Custom Action element. You'll pick it from the action list in the next step.
4. Use it in a topology #
- In the Admin UI sidebar, open Topologies and click New. Give the topology a name.
- The topology detail opens. Click Design to enter the editor.
- Open the element palette — either the + button in the bottom-left of the canvas, or right-click an empty spot. The palette lists element types (Event, Cron, Webhook, Connector, Batch, Custom Action, Breakpoint, Annotation), not specific actions.
- Drop an Event element onto the canvas. Double-click its label to rename it, e.g.
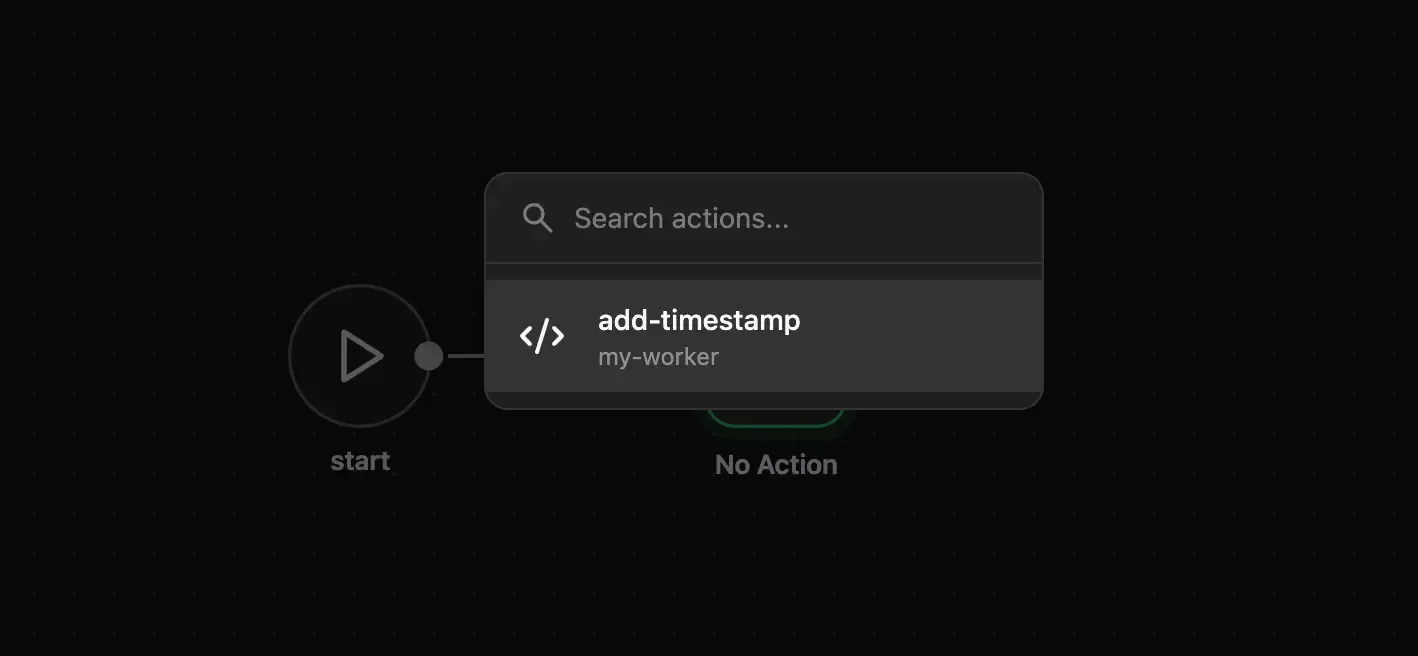
Start. This will be your manual trigger. - Drop a Custom Action element next to it. Double-click it to open the action picker and choose
add-timestampfrom the list of actions your workers expose. - Wire
Start -> add-timestamp, save and close the editor, then publish the topology and enable it. - Trigger a run from the
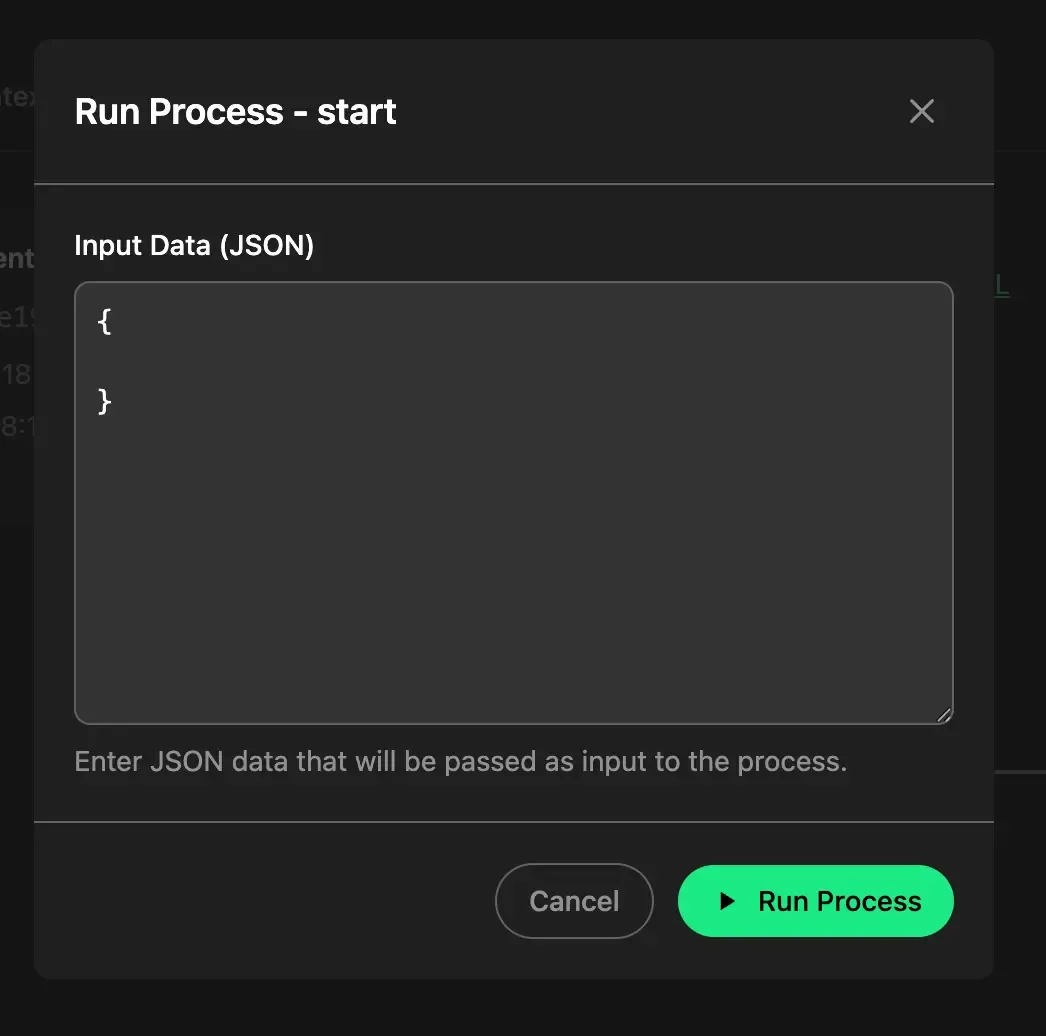
Startevent: either via its right-click context menu (Run), or from the action bar that appears above the canvas when the event is selected. You can paste a JSON test payload here.
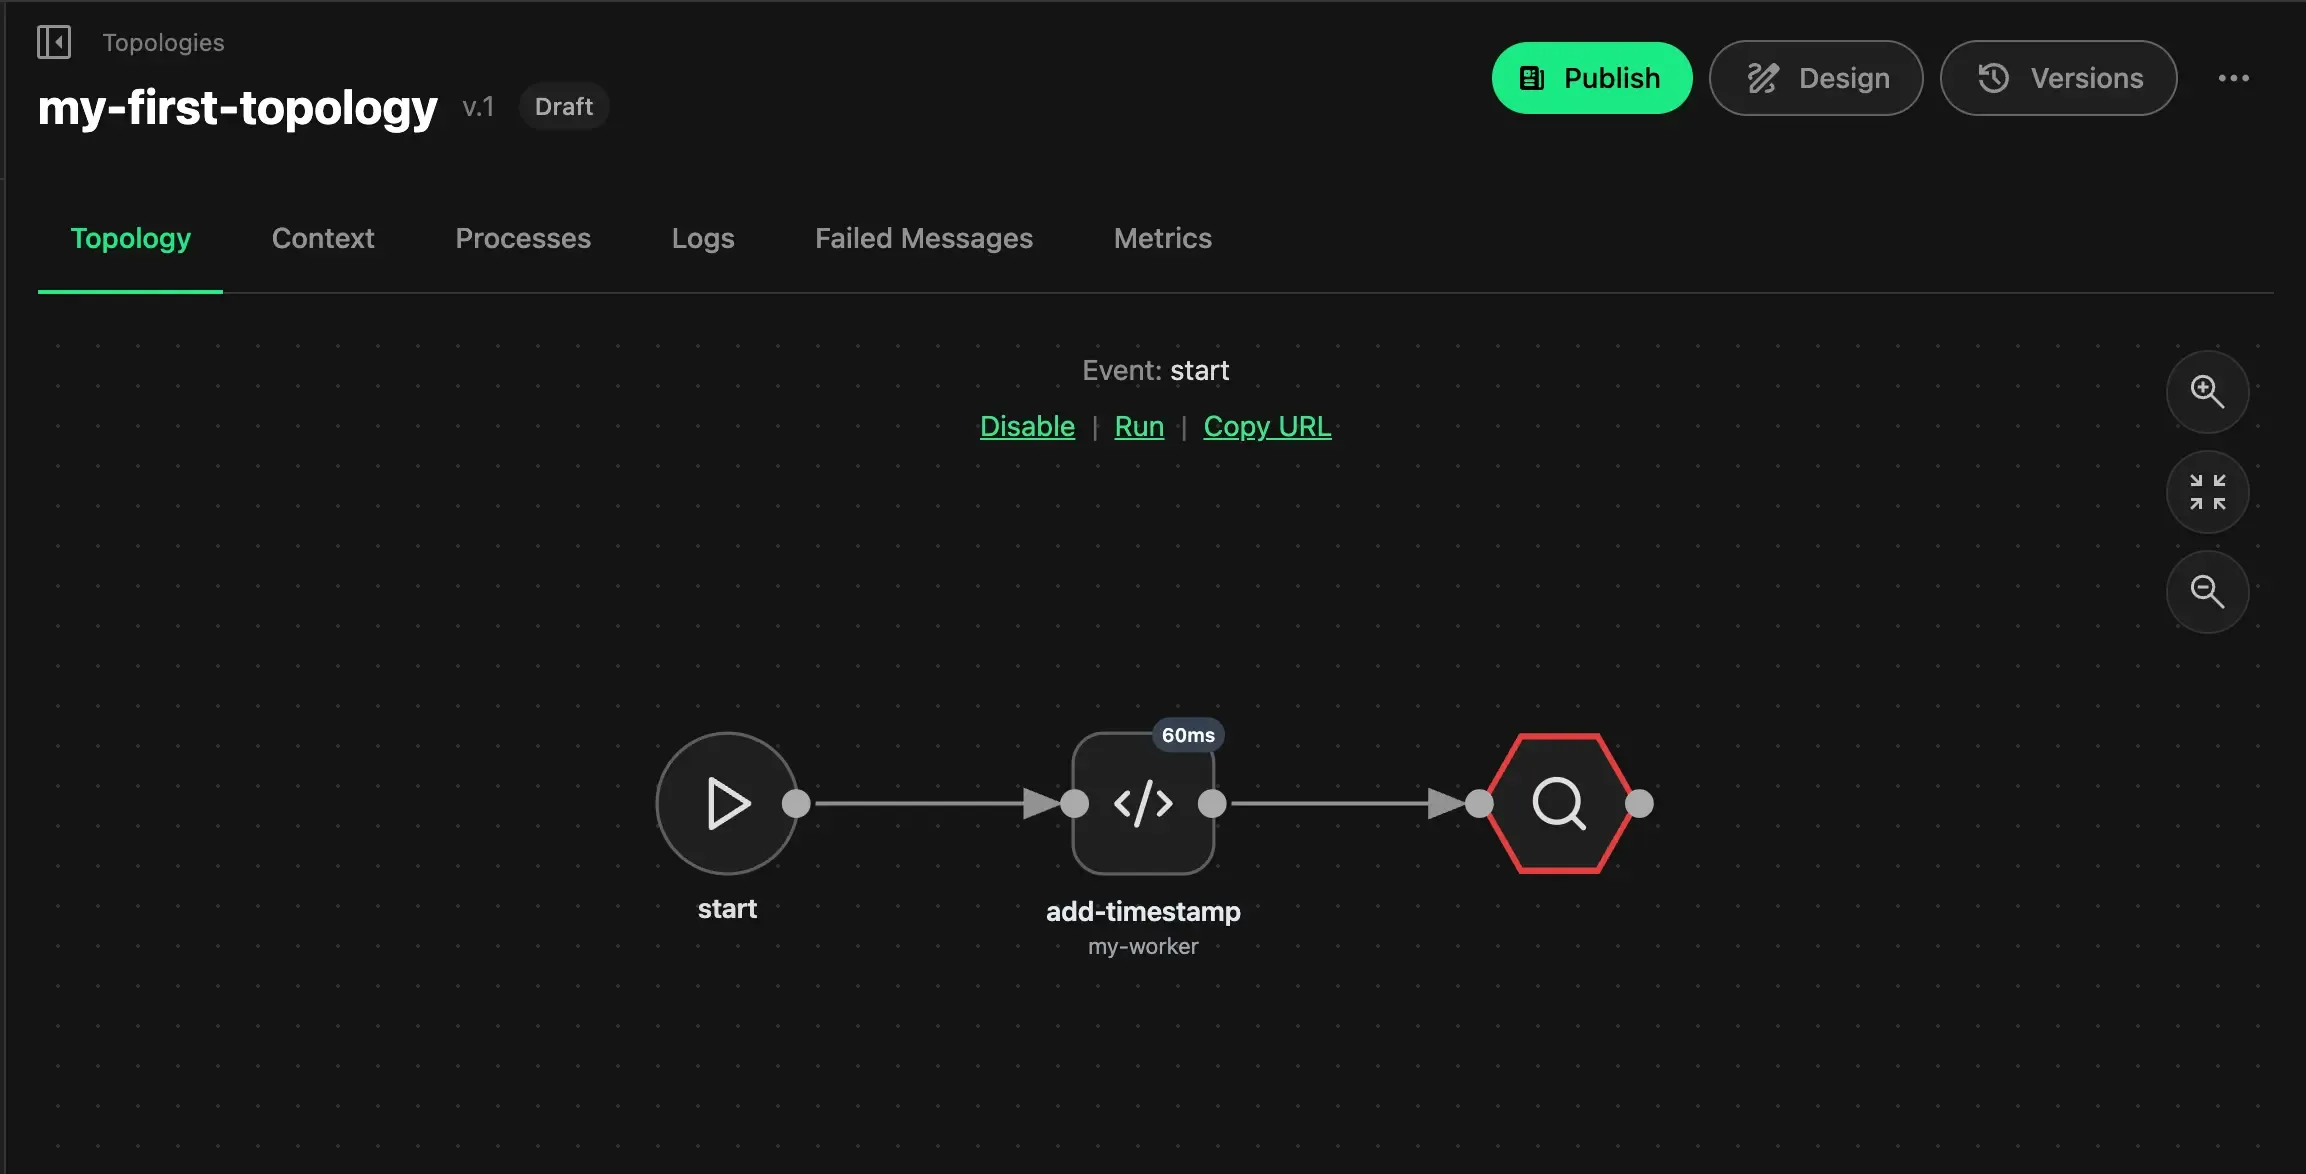
After step 6 the editor shows the wired topology as a draft, before you hit Publish and Enable:
Triggering the manual run opens a small dialog where you can paste an optional JSON test payload before the process kicks off:
Switch to the Processes tab on the topology detail. You should see the run succeeded and add-timestamp was visited.
To inspect the payload itself, go back to the editor, drop a Breakpoint element after add-timestamp, save and publish again, then trigger another run from the Start event. The breakpoint pauses the process at that point and shows the in-flight message before it leaves the node:
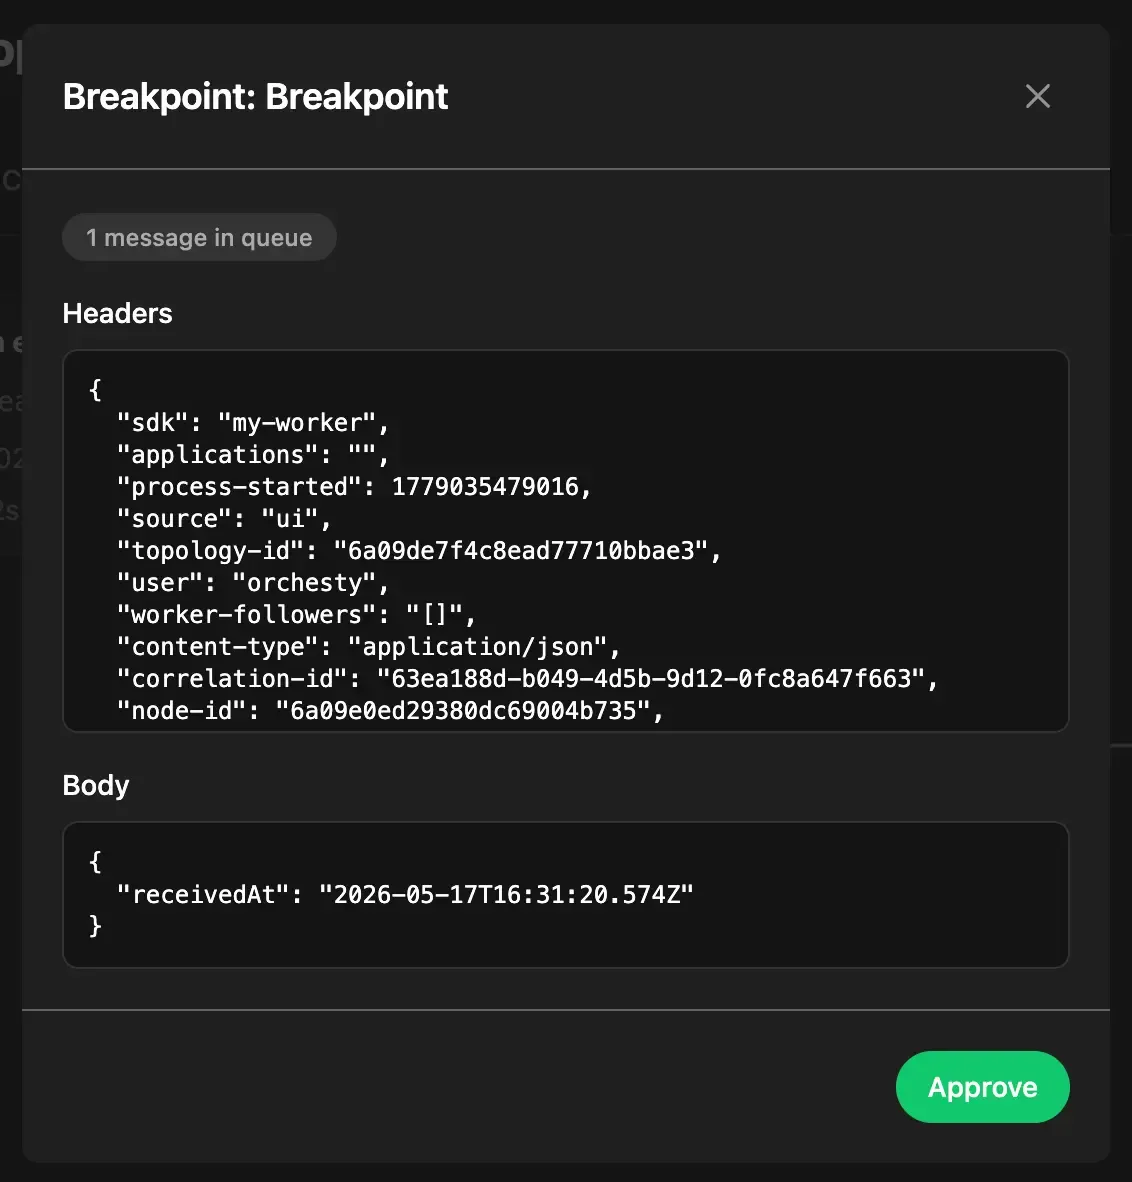
Breakpoints are a testing aid — they only pause when you trigger the process from the Admin UI. When the same topology is invoked via API, Cron, or a webhook, breakpoints are pass-through and don't stop anything.
What's next #
- More node types: Connectors, Batch nodes.
- Add authentication to talk to an external API: Basic Application.
- Or speed everything up with Using AI to bootstrap.